|
|
Theory of Operation.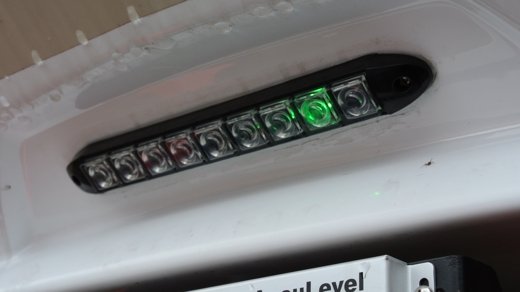
Note: The Eye has gone through several upgrades since the original project. You will find a few differences in the videos, as some of them show the original Eye
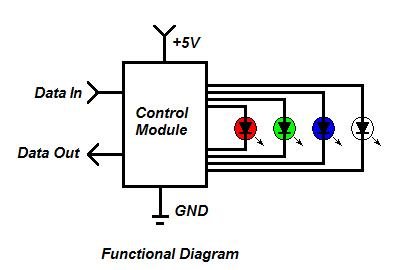
The Cylon Eye LED strip consists of WS2812 compatible addressable LED modules. While these look like ordinary LEDs, they have 4 leads, Red, Green, Blue, and White LEDs, and a control module. The goal of the Cylon Eye project is to retain the the original white hitch light on the RV nose, but then to add a bit of excitement when the hitch light is not needed. Input voltage is 5VDC which seems a bit unusual but is typical for digital logic circuitry. The LED is controlled by placing a data string on it's input that gives instruction as to which LED(s) to turn on or off, as well as their intensity. Typically an external controller is used to send the data string to the led strip.
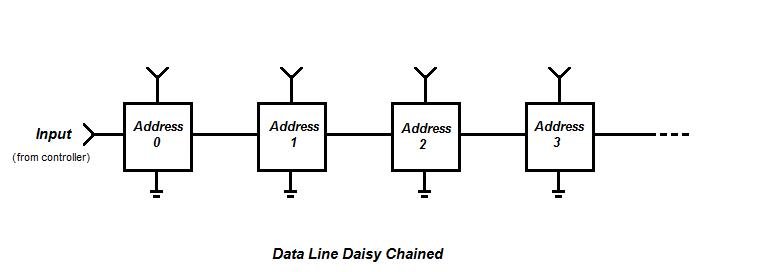
The LED modules are cascaded, or "daisy chained" so that the data output of the first module is connected to the input of the second module, and so on. The modules are "self addressing" in that the first module assumes address 0, the second module assumes address 1, and so on. These addresses are setup during the string initialization, a function of the controller. In the same way kids used to "count off" in a line for grade-school gym class, the LED modules resolve their addresses.
It should be noted that testing the LED strip requires test data to be sent to the LED strip from a controller. Simply applying 5V to the strip will not turn any LEDs on. This can be a troubleshooting challenge when building this project as you may not be able to determine the source of the problem unless you know the controller and LED strip are functional. However, you can buy a Bluetooth-powered controller that can command a WS2811/2812 LED strip which can aid in troubleshooting. Next, a driver board is needed. The driver board is a combination of a 5VDC power supply and a Atmel ATTiny85 microcontroller which sends out the data strings. The ATTiny85 must be setup a bit differently in that it must operate at 8Mhz. Typically they ship from the factory running at 1Mhz. This change is done during programming and the procedure will be detailed at that time. The LED strip re-purposes a commercially available 9 LED Daylight Running Light module that is available from several sources. I am replacing the clear LED strip on the nose of my RV with a black one as my strip has received UV damage after being exposed for only a year in the moderate Midwest US sun. The clear strips are harder to find, and since they tend to yellow with age, the black strip seems the best. And the black strip looks better on my RV too.
Notes:

Note that when ordering the circuit board for the Eye, I recommend the 2 oz copper, 0.8mm thickness boards as they are a bit thinner and fits into the bezel easier. While the cost is the same, there is a bit longer lead time in it's manufacturing. If you don't want to wait the extra 1-2 weeks, you can buy the standard thickness boards, but you may not be able to get the board to snap into the bezel properly.
Construction of the latest version eye board.
|