|
|
This page contains all of the various electronics and Arduino-Based projects I have created for my RV. You can build any or all of the projects for your RV. The projects on this list require building a circuit board (soldering skills), and in many cases, uploading a sketch into an Arduino (ATmel) micro controller.
This is the "electronics hobbyist" section of RV-Project.Com.
It does not include projects such as wiring LED strips or a backup camera - unless those projects also include construction of an electronic circuit. For those projects, look in the Motorhome Projects as well as the Trailer Projects menus.
Everone knows the need for AC Surge Suppression. But DC Surge Suppression is also needed, but often lacking in the typical RV. The result; premature failure of LED lighting and other DC powered electronics. In this project, we construct various DC Surge Suppressors.
This sign uses an ATTiny85 to control a stip of RGB lights. It features several different patterns that can be selected via DiP Switch, a rechargeable battery, and a photocell to turn the sign on automatically at night. The sign will last several evenings on a single battery charge.
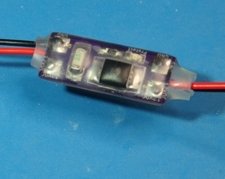
Also an ATTiny85 project. This monitor displays a LED to indicate the current DC bus voltage; whether it be in discharge or charge state. And if in the charge state, an indicator will display the charge mode - Trickle, Normal, or Bulk. The Charge/Battery monitor will help determine the health of your battery.
Cylon Eye? OK, how about Kitt from the series Knight Rider. It is actually a multi-function light bar that has several modes; including a work-light (original function), a digital leveler, and a clearance light so you don't bump into the pin-box when you are walking around at night. The clearance light oscillates like the Cylon Eye/Knight Rider Kitt television series. It is also ATTiny85 based, and includes an accellerometer for the leveler function.
This water alarm, based on Sparkfun's H2OhNo water sensor allows multiple sensors to be wired into a monitor. This allows sensors to be placed in several areas around the RV; for example under the sinks, shower, and wet areas. If a sensor detects water, it sends a signal to the monitor which process the alarm. ATTiny85s are used for the sensors, while an Arduino Nano is used for the monitor. A set of relay contacts are included to provide remote annuncuation of alarm conditions.
This is an ideal first project, and it consists of an adapter that provides 12V power at the wiring harness at the front of your trailer. It is useful for powering low-current demand items such as the RV Automated sign.
This is more of an electrical rather than electronic project, but still is very useful if you have a wiring issue with your trailer's 7-pin connector, or need to see how much current is going to your trailer brakes. This project does not have a circuit board as everything inside is wired point-to-point.
We custom build a dimmer that is compatible with both Lippert Linc Receivers, Wireless Relay controllers, or as a stand-alone dimmer without remote control. It is ATtiny85 based, and can be controlled at the console, remotely, or a combination of both. It is a universal module with many configuration options.
Installing the wireless base system, consisting of two super-dimmers. In future projects, we will add-on to this base system until we have a comprehensive wireless control system in the RV.
In this project, we add on to the wireless Base System with awning control (note: this project is not needed if you are using the Lippert Linc Remotes, as they already have an awning control mechanism).
Build this stand-alone wireless project using wireless relays, or integrate it into the overall wireless system. In this project, we have installed a wireless relay into our bedroom light switch.
We are going to control the power to the Furrion backup camera with a Wireless Relay so we can turn it on or off without having to enter the RV.
This project consists of retrofitting a MaxxAir fan having a 4-speed wall thermostat for wireless remote control.
This project consists of a remote controlled reading light that can be mounted on a wall, such as a headboard, or on the ceiling, such as over a sofa or recliner.
In this project, I install a 3-way capable dimmer in the RV. Although I don't have the need for the additional 3-way switch, I demonstrate how to connect the dimmer in a 3-way configuration.
In this project, I make 4 useful dimmers for various applications. They range from 1W to 40W in the load they can handle.
|